

**Schedule a Free Camera Consult →
85% of CCTV footage is never reviewed (Source: VideoraIQ). This complete guide dome security shows you how to pick, place, and set up dome cameras so you catch events in real time, not the next day.
Dome cameras are fixed or varifocal IP cameras inside a clear vandal‑resistant bubble. They sit tight to ceilings and soffits, hide the pointing angle, and give you wide coverage indoors and out. If you want one camera to discreetly watch an entry, a hall, or a parking bay, this style works well.
By the end, you’ll know the exact steps to choose resolution, lens, night vision, storage, and AI alerts. You’ll also avoid setup traps that blur faces or flood your phone with alerts. And because 2027 gear and software keep getting smarter, I’ll show you how to add cloud AI to cameras you already own without adding on‑site servers.
What Is a Dome Security Camera and Why Is It So Popular?
A dome camera gets its name from the clear, half‑sphere housing. That bubble shields the lens, masks its direction, and boosts tamper resistance. Most domes use metal bases and polycarbonate covers, and many support ceiling or wall mounts with simple junction boxes.
Because the dome hides the aim, people can’t tell if it’s looking left, right, or straight at them. That alone reduces tampering. In addition, many domes are sold as “vandal‑resistant,” and higher‑end units use impact‑rated housings. You also get a tight footprint that blends with ceilings, hotel lobbies, and storefronts.
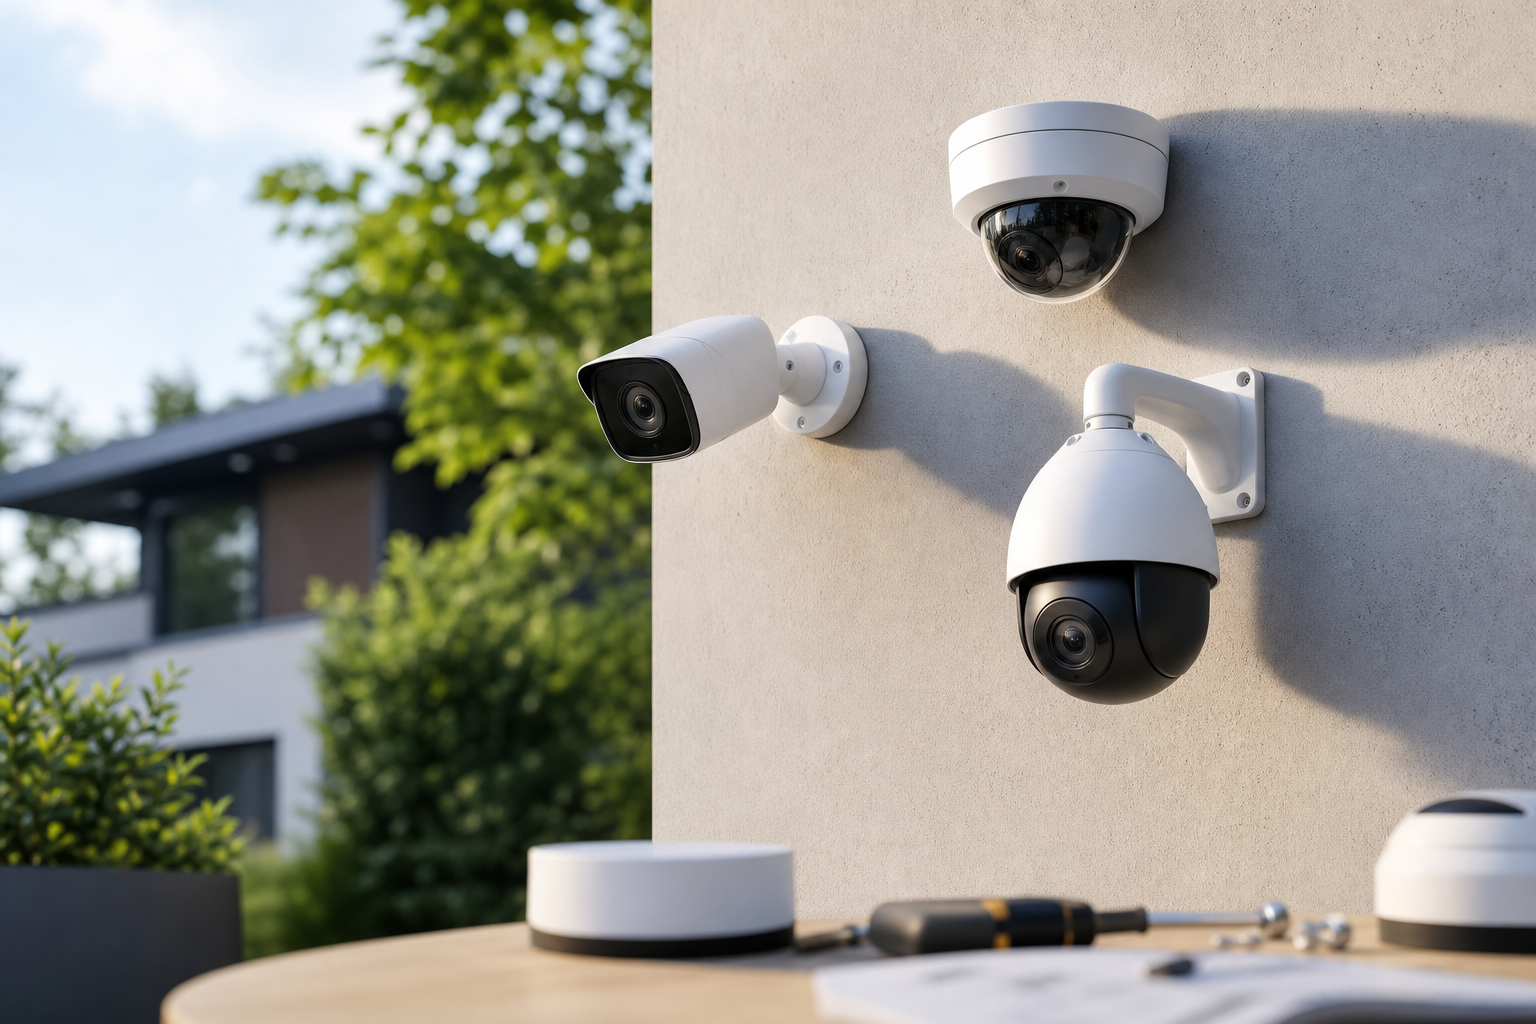
Compared to other styles, domes prioritize coverage and discretion. A bullet camera is easier to aim and can fit big IR arrays, but it screams “camera” and is easy to grab. A PTZ can pan, tilt, and zoom, which is great for live operators, yet it costs more and can miss moments while it’s pointing elsewhere. For fixed views like doors, cash wraps, and corridors, a dome is the set‑and‑forget choice.
Key advantages you’ll notice on day one:
- Discreet profile: low‑key look that blends into ceilings and soffits.
- Tamper resistance: hard to twist, grab, or spray from the front.
- Wide coverage: many domes use wide lenses to cover entries and halls.
- Indoor/outdoor use: weather‑rated models handle rain and dust with the right IP rating.
Moreover, the best use of a dome is simple: pick the view, lock the aim, and let your software handle alerts. Say you want faces at a front door plus a slice of the lot. A varifocal dome lets you dial the zoom so you hit both, then you won’t touch it again for years. To keep this complete guide dome security balanced, I’ll highlight where bullets or PTZs beat domes too, so you pick the right tool for each spot.
Dome vs. Bullet vs. PTZ at a Glance
- Dome: discreet, vandal‑resistant, wide FoV, great for fixed views.
- Bullet: visible deterrent, easy to aim, good for walls and long IR.
- PTZ: operator‑driven coverage, active tracking, pricier and moving parts.
Also Read!
How to Choose Fire and Smoke Detection Security Cameras for Airports and Transit Stations
How to Choose the Right Dome Camera: A Step-by-Step Framework
Picking a dome is easier with a simple seven‑step plan. Follow these in order so you don’t paint yourself into a corner with storage or bandwidth.
Environment and Resolution
-
Determine indoor vs.
First, decide where the camera lives. For outdoor or dusty bays, look for IP66/IP67 on the spec sheet. IP ratings describe dust and water resistance standards like IP Code. For indoor offices and halls, a non‑sealed dome is fine. -
Pick resolution
Second, choose resolution for your key task. 1080p is 1920×1080 (about 2MP) and is fine for small rooms. 4K is 3840×2160 (about 8MP) and gives more detail for doors, lots, and crop‑in review. If you want reliable face detail at a busy entry, favor 4K. This complete guide dome security suggests mixing both: 4K on doors and wide areas, 1080p on secondary angles.
Night Vision and Lens
-
Decide on IR night vision range
Third, check the rated IR range on the datasheet. As a rule of thumb, 30 ft covers small rooms, 65 ft covers small yards, and 100 ft handles wider lots. In addition, aim IR away from bright walls or signs to avoid bounce and haze. If your scene has street lights, you may prefer low‑light color modes over IR. -
Check lens type: varifocal vs. Fourth, choose your lens. Fixed 2.8 mm lenses give a wide view for short ranges.
Varifocal lenses (e.g., 2.8–12 mm) let you zoom to frame a door or aisle. For mixed use sites, varifocal saves time. However, if you know the exact view, a fixed lens is cheaper and simpler.
Power and Connectivity
- Wired vs.
Fifth, decide on power and network. Wired PoE runs data and power on one cable and is stable for 24/7 use.
Wireless is fast to place but depends on signal strength and power at the mount. If you can pull cable, PoE is my go‑to. For background, see Power over Ethernet.
Storage Options
- Storage: NVR, SD, or cloud
Sixth, plan where video lives. An on‑site NVR keeps control local and works without internet. SD card can bridge network blips but is not a long‑term archive. Cloud storage lets you view and share clips from anywhere. For larger fleets, cloud AI tools that are cloud‑based with no need for on‑premise servers reduce upkeep.
AI and Alerts
- AI features and alerts
Seventh, look for smart features: motion zones, person and vehicle detection, line cross, and package/object alerts. In addition, choose a VMS or cloud AI that works with existing cameras across 200+ brands. That way you can add smarts to cameras you already own and grow over time.
Moreover, think about the bigger security picture across your office or campus. If you manage facilities, you may like this field guide on planning and risk mapping: corporate security. Use it to map entrances, high‑value zones, and choke points before you buy more gear. For 2027 rollouts, this saves both labor and storage later.
**Schedule a Free Camera Consult →
5 Common Mistakes People Make With Dome Cameras
First, mounting too high and losing facial detail. Keep domes at about 8–10 ft indoors and 9–12 ft outdoors near doors. Higher mounts see bodies, not faces. If you must mount high, use a tighter lens and angle the view toward the target height.
Second, ignoring IR bounce from nearby walls. IR light reflects off light‑colored walls and signs, which can haze the image. Therefore, avoid pointing domes straight at close walls. Pull the mount out with a small arm or aim slightly off‑axis to keep the IR spill out of frame.
Third, choosing low resolution to save money. Saving $40 on a 1080p unit hurts later when you can’t ID a face or plate in a key clip. Instead, put 4K on doors, registers, and gates where proof matters, and use 1080p for “context” views.
Bandwidth and Analytics
Fourth, forgetting bandwidth and storage math. Add up bitrates before you add five more cameras. On slow uplinks, cloud uploads will lag. As a result, set schedules, enable H.265 if supported, and cap max bitrates per camera.
Fifth, not pairing cameras with smart analytics. 85% of CCTV footage is never reviewed, so you need alerts to spot real events as they happen. Tools with 9 AI detection engines including face recognition, intrusion detection, fire & smoke detection, and more can route only the right clips to your team. Use motion zones to cut false alerts, and send proof to the right on‑call person.
"We went from finding out about incidents in the morning briefing to being notified in real time. VideoraIQ caught an intruder at 2AM that our overnight guard missed. That one event alone justified the entire platform cost." — Ananya Mehta, Head of Facilities, 200-Camera Corporate Campus
As you work through this complete guide dome security, keep a short checklist: height, aim, light, network, and alerts. Fix those five, and your domes will pull their weight.
Also Read!
How to Choose a Fire and Smoke Detection Security Camera for Manufacturing Plants and Warehouses
How to Choose Fire and Smoke Detection Security Cameras for Retail Stores and Chains
Tools and Software That Make Dome Cameras Smarter
Great video starts with placement, but software turns video into action. You have three layers to consider: VMS (video management software), NVR firmware, and cloud AI analytics. A VMS like Milestone or Blue Iris brings live view, recording, and rules. NVRs from major brands add simple timelines and mobile apps. Cloud AI sits above both and adds detection, alerting, and searchable clips without on‑site servers.
Tools like VideoraIQ are one option to add AI‑driven detection to existing dome setups. It integrates with existing IP-based CCTV systems without additional hardware, works with existing cameras across 200+ brands, and is cloud-based with no need for on-premise servers. You get real-time alerts with video proof, location tag, and timestamp, <3 seconds alert latency, and 99.4% detection accuracy. That means fewer missed events and faster response. For regulated sites, VideoraIQ is GDPR compliant and HIPAA compliant, which helps security and privacy teams sign off.
Open-source routes exist too. Frigate (with hardware acceleration) and ZoneMinder can run person and object alerts on your own box. However, they require more care and updates. If you manage many sites or travel a lot, cloud alerts with sub‑3‑second delivery save time.
Furthermore, analytics like Zone-Based Monitoring and Heatmaps & Analytics help you tune coverage and plan staffing. If you oversee stores or offices, pair this with a site playbook like corporate security to align cameras with risk and flow. In 2027, the smartest stack is simple cams plus strong cloud AI, less to maintain, faster to act.
Software Options at a Glance
- VMS: on‑prem control, deep rules, great for fixed sites.
- NVR apps: simple timelines, local storage, basic alerts.
- Cloud AI: fast setup, brand‑agnostic, real‑time proof with sharing.
What to Do Next: Your First Week With a Dome Camera
Day 1: Audit your property. Walk entries, lots, and halls. Mark camera spots on a simple map. Note height options and where you can run PoE. This complete guide dome security suggests you tag “must‑have” faces and plates so you know where 4K belongs.
Day 2: Test angles before you drill. Use a painter’s pole, a ladder, or a temp mount. View on your phone while a friend stands in the frame. Check face clarity at the far edge, day and night.
Day 3: Mount and aim with care. Keep indoor domes at 8–10 ft and avoid bright walls in the IR cone. Tighten the dome, then wipe the bubble to prevent glare.
Days 4–7: Configure and Tune
Day 4: Configure motion zones. Draw zones on doors, gates, and aisles. Exclude trees, fan shadows, and TV screens. Set person and vehicle rules where they make sense.
Day 5: Set up remote view and alerts. Share the app with your team. Add schedules so the right people get the right pings. Send test alerts with video proof to confirm links work.
Day 6: Tune sensitivity. Lower sensitivity if you see small false events. Raise it if you miss entries. In addition, enable Zone-Based Monitoring to focus on high‑risk areas.
Day 7: Review one week of clips. Use Heatmaps & Analytics to spot hot zones and dead angles. Move one camera or change a lens if the data suggests it.

Key Takeaways
- Dome cameras hide their aim, resist tampering, and cover wide areas; use bullets or PTZs where deterrence or operator control is key.
- Pick IP66/67 for outdoors, 4K for proof points, and varifocal lenses when you need framing flexibility.
- Cloud AI with real-time alerts turns 85% “never reviewed” footage into action; aim for <3‑second delivery and video proof.
- In 2027, simple PoE domes plus cloud analytics cut upkeep and scale across sites without on‑prem servers.
- Use zones, heatmaps, and a 7‑day review cycle to fine‑tune views and cut false alerts.
What to Do This Week
Walk your site, mark views, and test angles before you drill. Then set zones and alerts, and schedule a one‑week review to tune sensitivity. If you want fast, neutral help sizing lenses, IP ratings, and storage for your layout, send a quick note and include a photo of each spot.
Sources
- IP ratings explained: Ingress Protection (IP) Code
- Network and power basics: Power over Ethernet (PoE)